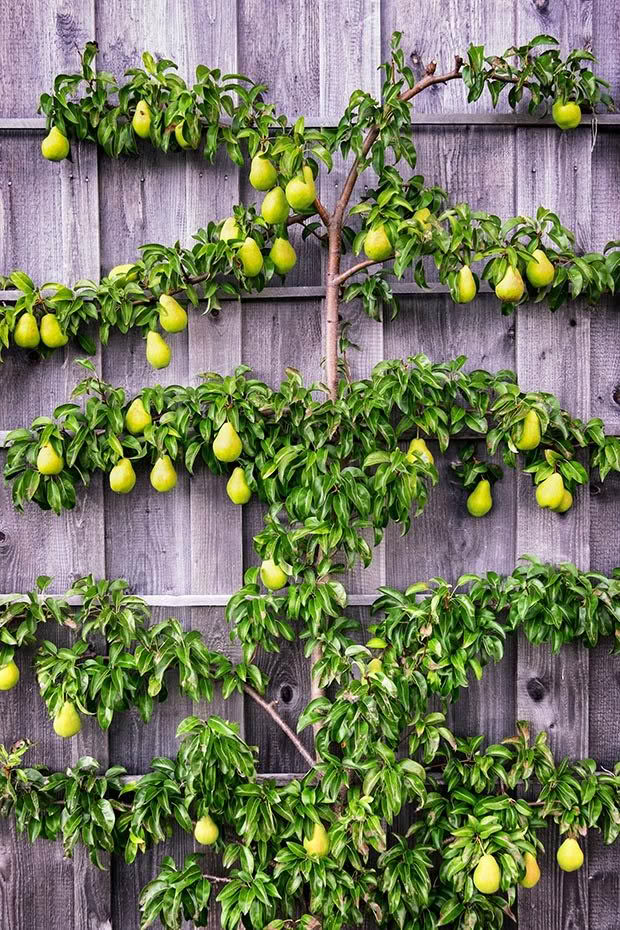
How to espalier fruit trees

Winter is a good time to start an espaliered fruit tree. However, some trees adapt better to espalier than others.
Apples and pears are traditionally used, as their branches are flexible and they fruit repeatedly on the same spurs. A small number of apple and pear cultivars are tip-bearing, but spur-bearing varieties are best for espaliering.
Quinces, olives, almonds, crabapples and figs can also be trained.
Tamarillos, although not typically used in espaliers, can be cut low and trained into a fan shape.
Stone fruit (peaches, plums, nectarines and cherries) are best trained into a fan shape as their more brittle wood is difficult to train horizontally.
GETTING STARTED
You can espalier trees against a wall or fence, or create a free-standing living screen or fence between you and your neighbours.
Make a support frame by fixing horizontal wires to a fence or posts using eyebolts.
Use a 2.5mm galvanised high tensile wire and create two or three tiers spaced 30-50cm apart.
Dig a planting hole 30cm from the fence.
YEAR 1, WINTER
To espalier an apple or pear tree, plant it, then prune the tree to the height where you want your first tier (just above the first wire) and where there are several strong buds just below the cut.
YEAR 1, SUMMER
Come spring, the buds will shoot.
In summer, train one shoot vertically, one to the left and one to the right. This is easiest done by securing three wooden stakes temporarily to your support frame, one placed vertically behind the central stem, the other two at 45° angles to the left and right of the middle stake.
Don’t bend the young branches completely horizontal at this stage as they’re still tender and may snap. Tie the three shoots to your stakes regularly as they continue to grow over summer using a flexible tie or pantyhose.
Any shoots below these three should be trimmed back to about three leaves.
Remove all forming fruit in the first year to divert the plant’s energies into growth.
YEAR 2, WINTER
Untie the 45° angled side shoots, remove the stakes and gently lower the shoots to a horizontal position. Tie shoots in place, cutting them back by a third.
Cut back the central vertical shoot to just above the next wire on the support frame.
Choose a bud at this height that has two more buds beneath on opposite sides so you can repeat the process.
Remove any excess shoots above and below the first tier of branches. Cut flush with the main stem.
YEAR 2, SUMMER
Again, tie three wooden stakes to your support frame, one vertically and two at 45° angles. Train the next tier of shoots along these stakes.
Remove any other shoots, cutting back to about three leaves.
Keep training the horizontal branches of your first tier along the bottom wires. If any side shoots form on these, trim these back to three leaves.
FOLLOWING YEARS
Repeat the process until you’ve achieved the desired number of tiers.
To stop further growth, cut the central stem to just above the last tier of horizontal branches.
Likewise, when your horizontal branches reach the desired length, stop further growth by cutting back the tip.
Each summer, trim back any side shoots that grow from your main stems to three leaves.
The most important thing to remember is to trim your espaliers twice a year, once in winter and again after they’ve finished fruiting in summer.
Love this story? Subscribe now!
 This article first appeared in NZ Lifestyle Block Magazine.
