11 things to use for perfect sourdough (plus the secret ingredient you’ve never heard of)
Take your sourdough from adequate to artisan with these tools of the trade.
Words: Nadene Hall Images: William Chun, Neville Chun
A cup of soup is a comforting treat for kids. When Neville Chun’s children started having a cup at pre-school each Wednesday, he thought he’d bake a loaf of sourdough to go with it.
Things quickly snowballed. The teacher asked if he’d made her a loaf. Then two. Then three. The parents got wind of it. Neville bought a bigger oven.
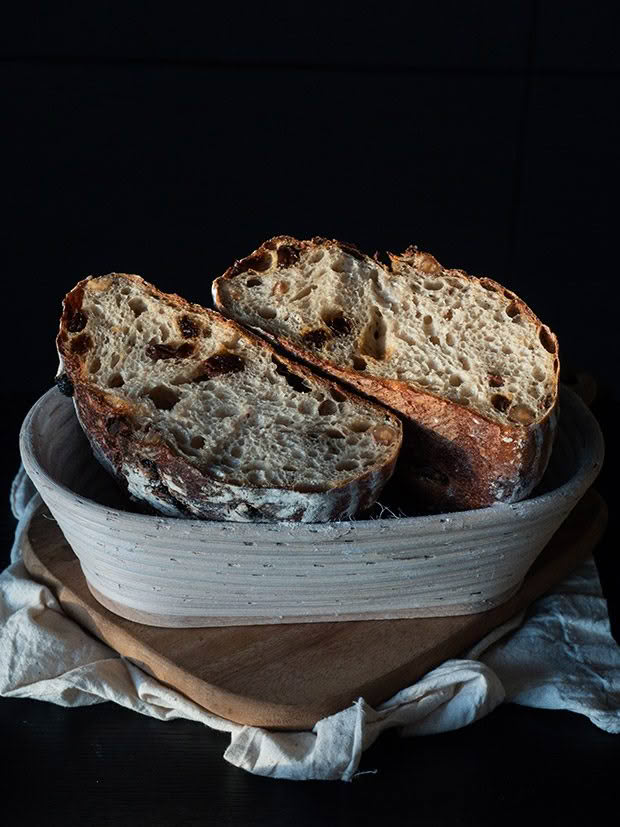
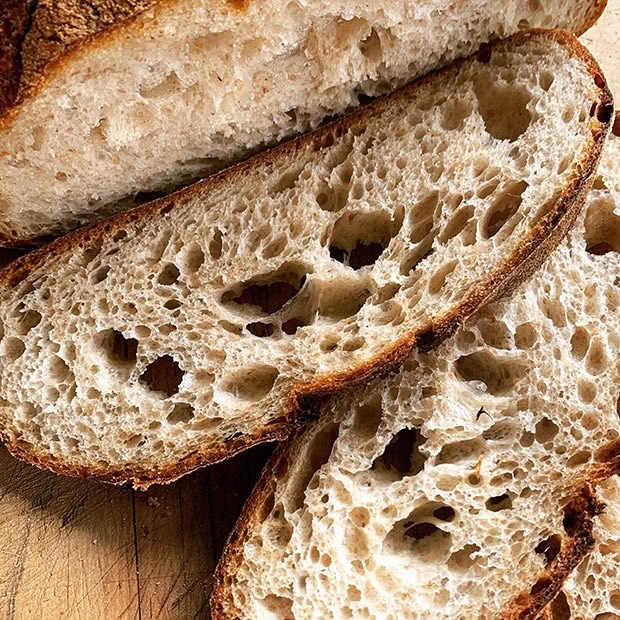
Neville Chun bakes 75 sourdough loaves a week.
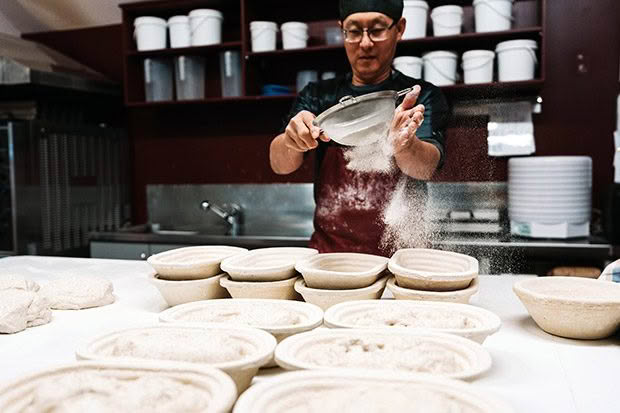
Fifteen years later, he bakes 75 loaves of bread a week for a local organic store in his games-room-turned-certified bakery at his Lower Hutt home. He’s learned a lot about creating good sourdough, including the ingredients and equipment that can help you transform your baking. He’s so passionate about it, he now imports equipment and has created six NZ sourdough starters that he sells online.
“Back when I started, there was very little in the way of product you could easily obtain. I managed to get these things from overseas, but it took ages and I thought it would be the same problem for everyone else.”
These are the ingredients and products Neville has found helpful in creating the perfect sourdough.
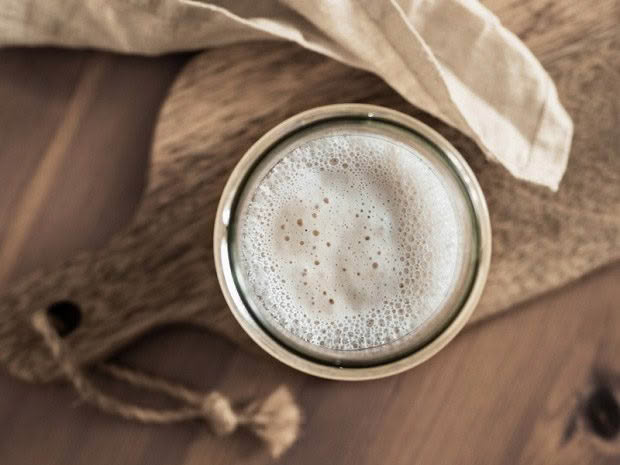
1. Use organic flour and bottle, filtered or artesian water for your starter
Neville recommends using organic flour and bottled, filtered, or artesian water if you’re creating a sourdough starter from scratch.
“You want to give yourself the best chance to kickstart the wild yeasts (in the flour). If you use plain flour and tap water, it’s ok, but there are substances that might inhibit the fermentation. Just for that initial starter, try to use pure, unadulterated ingredients.”
1b. Buy a starter
When Neville first started making sourdough, he imported some starters from the US.
“I didn’t know the process at all, so I bought some starters and was using them, and they were really slow – not that I knew that – and the results weren’t that great. When I made my own, it was fantastic, much faster, and I realised how fermentation is so important.”
However, buying a starter – Neville has created and sells six – means you get a starter with proven attributes: strength, a flavour profile, and wild yeasts that aren’t in your environment.
Neville now supplies organic starters to bakers in NZ, and has sold them to other bakers all over the world.
“I’ve even sent my NZ rye sourdough starters to Germany, the land of rye bread.”
2. Use organic flour in your dough
Neville has always used organic flour. Last year he got Organic Farm NZ accreditation, so the sourdough he sells is now officially certified organic.
“I use organic white flour which I source from Australia, and I mill my own New Zealand-grown wheat and rye, which I mix into the white flour to make my own particular ‘country sourdough’ loaf.”
Neville goes through a 25kg bag of white flour a week. For home bakers, he recommends buying small batches of bread flour and using it within a few months, so it’s always as fresh as possible.
He finds beginner bakers can get very excited and buy lots of different types of flour.
“Often, people end up with not enough time to try so many. I found I’d rather do a couple of loaves really well than six different types that are average.”
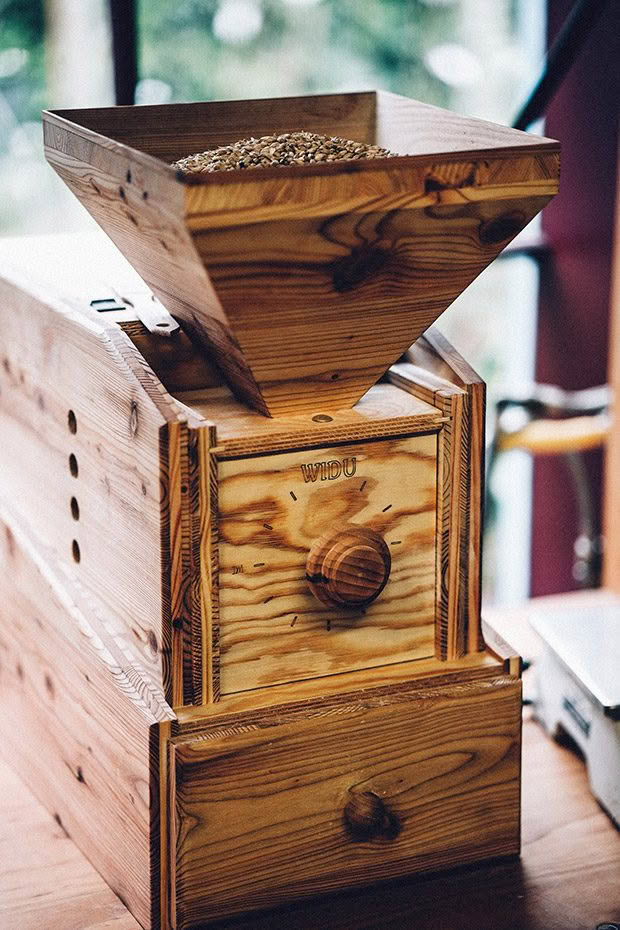
2b. Use fresh milled wholemeal flour
Wholemeal flour tends to go rancid far quicker than white flour, with an expiry date of just three months, unless you keep it in the fridge in an airtight container. Neville prefers to grind his own rye and wheat to create fresh milled wholemeal flour as he needs it.
“I have a German Widu commercial mill. There’s a New Zealand company called Flour Power Mill [www.flour-power-mill.co.nz] that distributes a lot of flour mills and has a good range.”

3. Add the secret ingredient
Peter Reinhart is a US baker and one of the world’s leading authorities on breadmaking. He’s written multiple award-winning books, including The Bread Baker’s Apprentice and Artisan Breads Every Day. If you read those books and others like them, you’ll come across an ingredient most people have never heard of.
“(Reinhart) adds diastatic malt. I couldn’t figure out what he was talking about. It wasn’t available in NZ (when I started), and it’s really hard to get from the US, so I found out how you make it.”
Neville now supplies organic diastatic malt to artisan and professional bakers around NZ – his son William sells it online [nzmalt.com], and Neville has it on TradeMe (nchun).
He mills fresh batches and sends it the same day as the order.
“It’s simply organic whole barley grains that are sprouted, then you dehydrate it and mill it into a powder.”
Neville says you can add it to any sourdough or yeast bread recipe that calls for a long fermentation or is retarded overnight in the fridge.
“It helps add that extra little special edge to your loaf. You get a sweeter natural flavour. It increases crust colour, it helps make the crumb a little lighter and more airy, and it adds nutrients.”
It’s also rich in minerals and enzymes that act as natural preservatives, so bread keeps for longer. You only need a tiny amount, added with the other dry ingredients. “You add half a percent to your flour, so if your recipe is 1kg of flour, you want 5g.”
4. Mix with a magic wand
Foodie website Epicurious says it looks like a ‘decent kitchen tool that got mangled in a vacuum cleaner accident’. Read reviews on bread blogs, and you’ll find baking fans refer to it as a ‘magic wand’. Neville calls it ‘the weirdest thing ever invented.’
“It’s a Danish dough whisk and it mixes the dough very efficiently.”
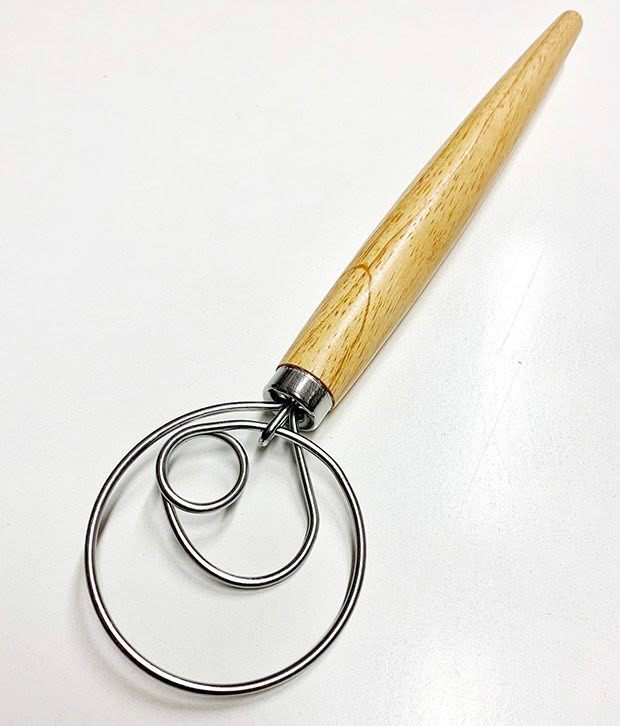
Sourdough and other bread recipes contain a lot of water, and the initial mix of wet and dry ingredients is a messy business. To avoid sticky, doughy hands and to get a good mix, the Danes came up with this special whisk.
The wires cut through thick baking ingredients of any kind (bread dough, muffin, or cake mixes), scraping up flour pockets and combining it quickly, so there’s no risk of over-mixing. It’s also brilliant if you need to add lumpy ingredients such as chocolate bits or raisins, spreading them evenly through a dough or batter.
5. Use a dough scraper
Another useful little tool to keep your hands, bowls, and work surface clear is a plastic dough scraper.
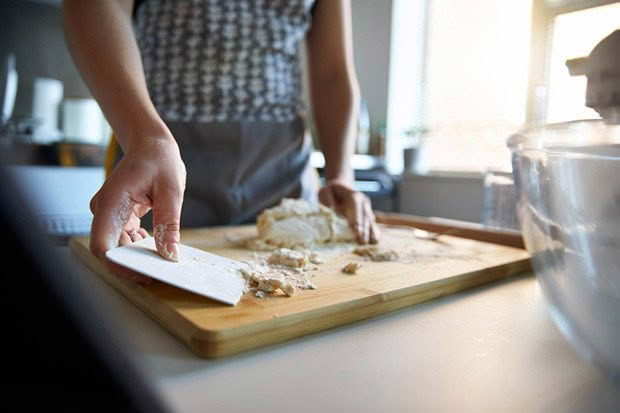
It cleanly scrapes the dough, and you can use it to cut the dough into loaves. You can also get larger steel ones used by commercial bakers.
6. Mist bottle
It’s simple, cheap, and very handy, says Neville.
“Mist the surface of the dough at all stages to keep it moist. You don’t want the dough surface to start drying out.”
If you use a Dutch oven (see below for why Neville says they’re a must), mist the loaf thoroughly before putting the lid on it. This helps to create more steam, which helps give the dough more oven spring.
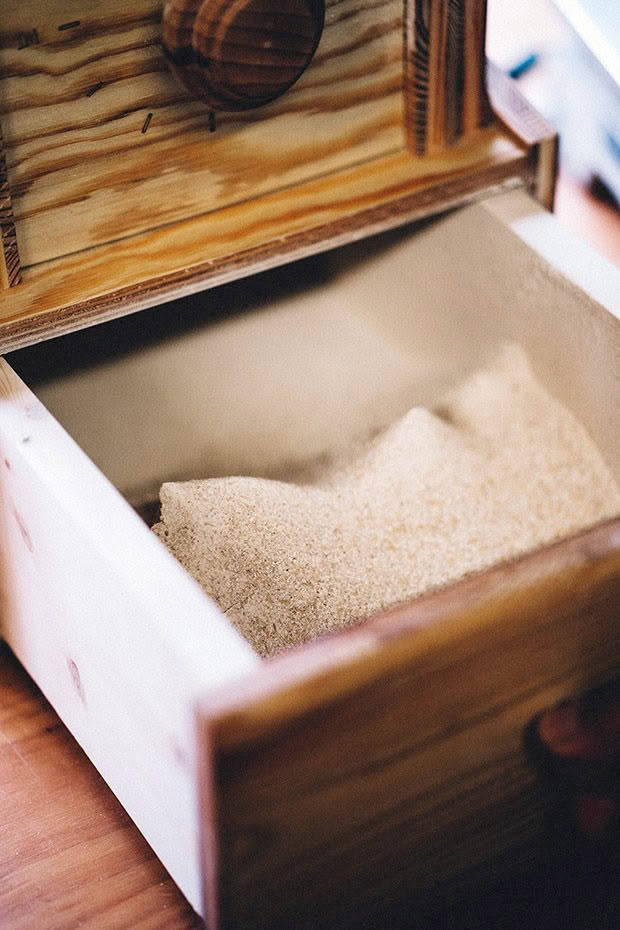
7. Use bannetons for the final proof
When NZ went into lockdown in early 2020, most people went straight to the baking aisle and bought all the flour. Sourdough enthusiasts went online and bought every last banneton they could find.
Bannetons are traditional oval or round baskets for holding dough, made from cane, rattan, or wood. Neville imports his ones from Germany. They’re made from sustainable conifer mash – “it feels a bit like cardboard” – so the dough doesn’t stick during the final fermentation. They often have pretty patterns inside which transfer to the bread.
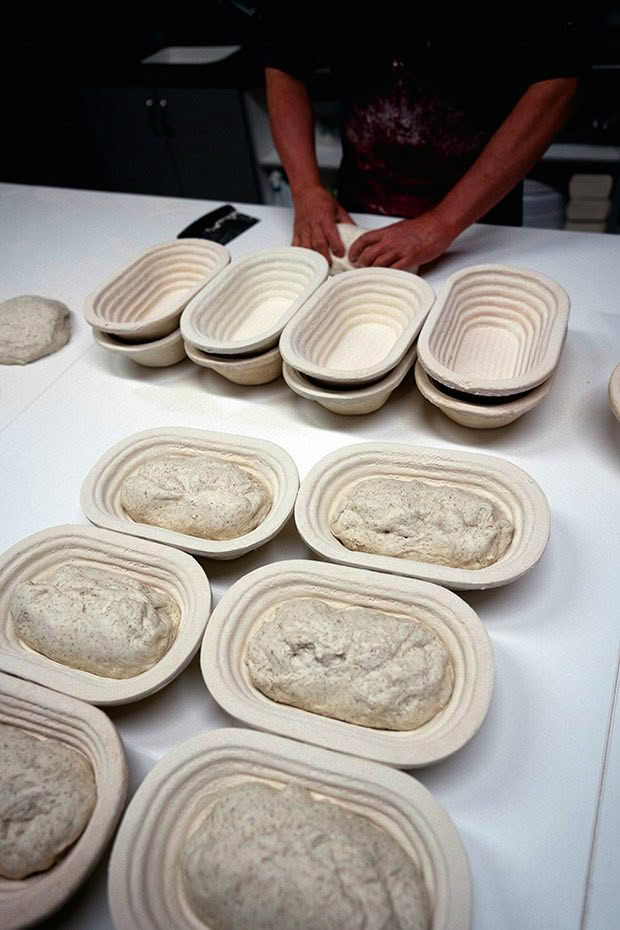
“It makes the whole job so much easier. You put the shaped dough into a banneton, and it supports and holds the shape of the bread until it’s ready to bake.”
If you don’t have a banneton, you can line a container such as a colander with a well-floured towel, then place your dough in it. The flour stops the dough sticking to the towel – Neville recommends rice flour if you use this option.
8. Cut it right
Scoring bread isn’t just so you get pretty patterns on top of a loaf. The gases and moisture released by a dough as it ‘springs’ in the first 15 minutes or so of cooking need somewhere to go. If you don’t make a cut of some kind, the dough will tear, often out the sides, flattening the loaf.
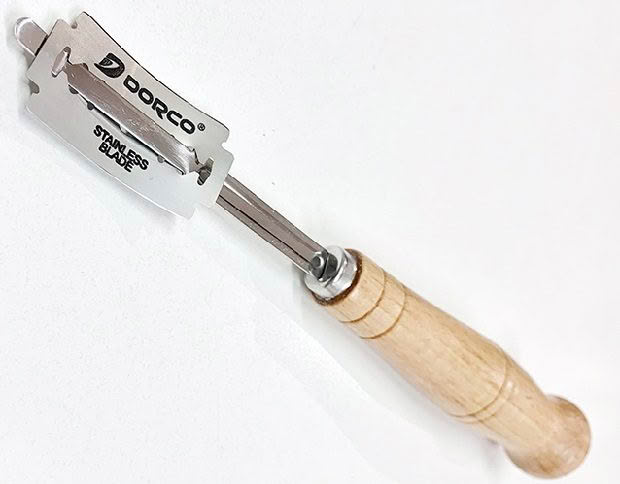
To release gases evenly but still keep the bread high, bakers use lame knives with replaceable, thin, incredibly sharp razor blades. It’s important it’s thin and sharp, so you create a neat cut, versus tearing the dough. The bonus is you can create pretty patterns.
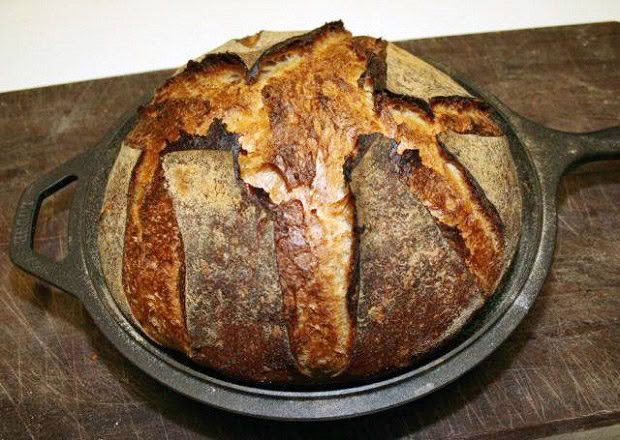
9. Go dutch
Neville uses a commercial bread oven, but even it can’t get the temperature right. When the dial says 210°C, his internal temperature gauge can read up to 240°C.
Standard kitchen ovens can be even more inaccurate and may also have pockets of cold and hot air. This means part of a dough might be undercooked, while another part is overdone.
There are three ways to work around a dodgy oven:
1. use an oven thermometer (cost around $10) which you read through the door and adjust the temperature dial as necessary;
2. turn your bread 180° halfway through baking;
3. use a Dutch oven.
A cast-iron Dutch oven is so good, it’s yet another product Neville started importing when he realised how many NZ ovens were baking bad.
“It’s the secret to making a sourdough that looks like its come out of a commercial oven. It encapsulates the moisture that the loaf is releasing when it’s first heated, recirculating it around the loaf which is basking in the moist environment, so you get maximum oven spring.
“Then you take the top off and let the crust develop in the dry environment of your oven. You can watch the colour develop and then bring it out when you think you like it.”
According to Neville, you can bake a loaf for ages, and it won’t catch fire. “It’s just gets darker and darker as the crust caramelises and those flavours permeate into the crumb. You get beautiful nuances of flavour that you’d never get if you baked it lightly or timidly.”
TYPES OF FLOUR
A grain of wheat has three layers:
– the endosperm, which is mostly starch.
– the bran, the grain’s hard outer shell which is mostly fibre;
– the germ, which will sprout to form a new plant, and is nutrient-rich;
White flour is made from the starchy endosperm. ‘Brown’ flour is made from a mix of the bran and endosperm. Wholemeal flour is made from all three layers.
1. High-grade flour
Protein level: 10-13.5%
Best used for: bread
Also known as strong flour, baker’s flour, bread flour, made from hard, high-protein wheat varieties, provides good amounts of gluten. Buy only 2-3 months’ worth of white flour at one time.
“You want a strong flour that’s high in protein, around 11.5-12% is considered strong,” says Neville. “Don’t go into a supermarket and buy a flour for cakes (eg, standard flour) as you’ll never have success (baking sourdough) with that.”
2. Wholemeal (wholegrain) flour
Protein level: 10-13.5%
Best used for: bread, cakes, biscuits, scones, muffins
Contains all the parts of the wheat grain, with four times the fibre and around twice the nutrients of white flour.
MORE HERE