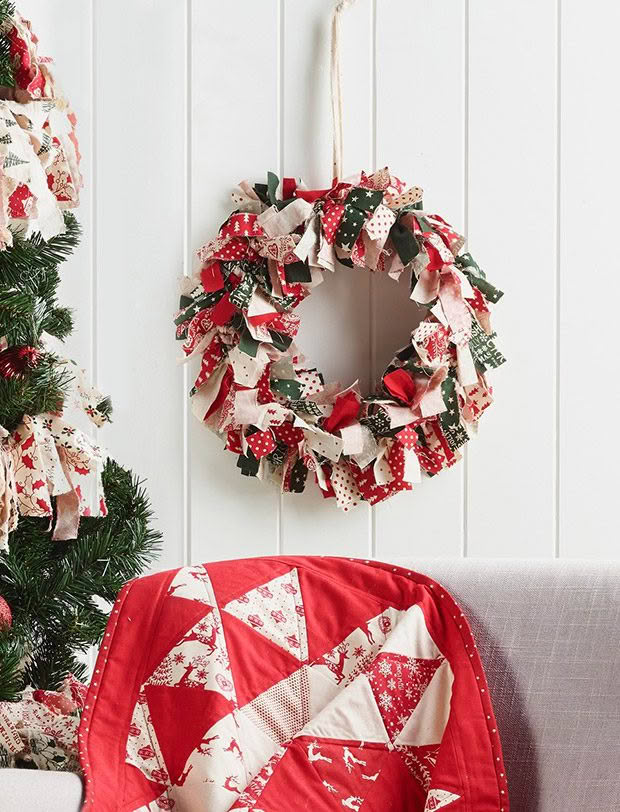
DIY Project: No Sew Christmas Wreath

Use new or recycled bits of fabric to make a funky twist on a classic decoration.
Guest post by Spotlight
Level: Easy
Read all instructions carefully before commencing the project.
MATERIALS
Rotary cutter
Mat
Quilters rulers
Scissors
20cm Fabric A – Pine Tree, red/natural*
20cm Fabric B – PineTree, natural/red
20cm Fabric C – Partridge, red/natural
20cm Fabric D – Partridge, natural/red
20cm Fabric E – Spot, red/natural
20cm Fabric F – Spot, natural/red
20cm Fabric G – Mini Star, natural/red
20cm Fabric H – Stars, green/natural
20cm Fabric I – Festive, green/natural
20cm Fabric J – Plain Green
50cm Fabric K – Plain Red
250mm Acrylic ring, natural
*Fabrics are from Spotlight’s ‘Scandi Christmas’ range
INSTRUCTIONS
Cutting
All strips are cut across the width of fabric unless otherwise stated.
From each of Fabrics A, B, C, D, E, F, G, H, I, J & K cut 2 x 2″ (5cm) strips (22 strips in total). Crosscut strips into 10″ lengths.
From Fabric F cut 42 x 1″ strips.
Wreath
Step 1: Take 1 x 1″ Fabric F strip and leaving a 5″ tail, tie fabric around the acrylic ring. With fabric on a bias angle (45 degrees), wrap fabric around the ring slightly overlapping the fabric as you go.
Continue wrapping and overlapping around the ring. To start the second 1″ strip, wrap and overlap the last few wraps to secure and continue wrapping and overlapping back to the start. Tie the end to the 5″ tail and leaving a 4″ tail cut off excess and set aside.
Step 2: Take the 2″ strips and alternating fabrics, tie and knot around the covered ring. Continue adding fabric strips bunching them close together until the ring is fully covered.
Step 3: Using the scissors snip into the end of each strip and tear up to the ring. This makes the wreath look fuller and gives a more natural look.
Step 4: To hang, decide which way you want your wreath to hang and tie the leftover 1″ fabric strip around the wreath at the top. Bring ends together and knot at desired length. Trim off excess fabric strip.

