DIY: A step-by-step guide to making a sustainable dress from old T-shirts
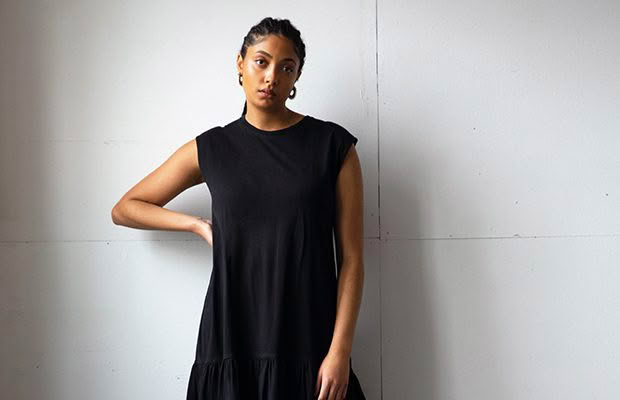
Want to reduce your impact on the world’s landfills full of discarded fashion? Start small and turn three old men’s t-shirts into a chic shirt dress with this handy tutorial.
With more than 350,000 tonnes of clothing sent to landfills each year in the UK alone, the fashion industry is one of the biggest polluters facing the modern age. If you’re beginning to question your clothing habits and impact on the environment, take pause before chucking old garments – they can be refashioned into new, sustainable clothing.
Portia Lawrie’s new book The Re:Fashion Wardrobe offers a guide to sourcing and selecting clothes for refashioning, before introducing 11 step-by-step projects which show just how easy it is to refresh or drastically change any piece of clothing. With just a little work, three old t-shirts become a fashionable T-shirt dress with this easy-to-follow guide.
Words: Portia Lawrie Images: Jamie Kendrick
My partner has a ‘Steve Jobs’ approach to dressing and, as a result, I have a constant supply of well-worn, well-washed black T-shirts to play with.
The thing about good-quality cotton jersey is that it becomes softer and softer over time. Usually, these black T-shirts make their way to my refashioning pile because they have become faded, have shrunk, the ribbing got worn through, or they were worn while decorating and have paint marks on them. Such was the case with the T-shirts used here. But the jersey was far too deliciously soft to let it go to waste.
Demonstrated within this project is the principle of adding additional fabric/length to an existing garment to add length (see page 133) – in this case, turning a T-shirt into a dress. This basic concept can be applied, in some form, to any of the tops in this book to create dress versions. You can add a gathered ‘frill’, like the one here, or a panel of ungathered fabric for a more minimalist, ‘column-like’ look.
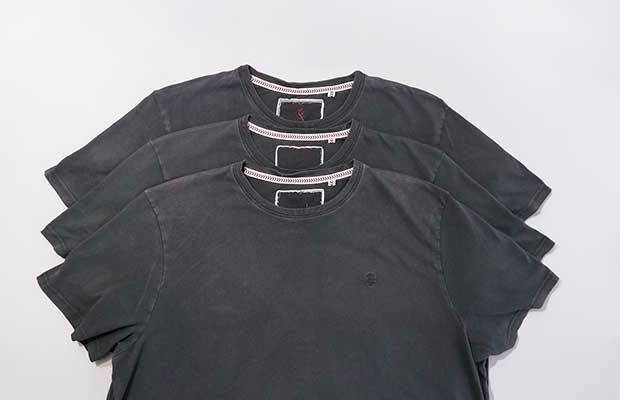
You will need:
· Source garments: 3 relaxed-fit T-shirts
· Mine are made from a cotton jersey blend
· Essential dressmaking equipment (see pages 30–33)
· Optional: 1 pack of black dye I used Intense Black machine dye by Dylon®
Method
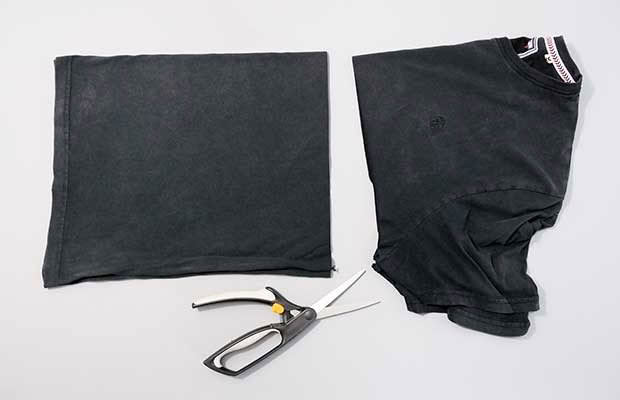
1. Select one T-shirt as the top section of the dress and unpick the hem. Remove the top sections of the remaining two T-shirts by cutting straight across, under the arms, as shown. Set aside the top sections (these can be used for future projects). Retain the bottom portions for the skirt section.
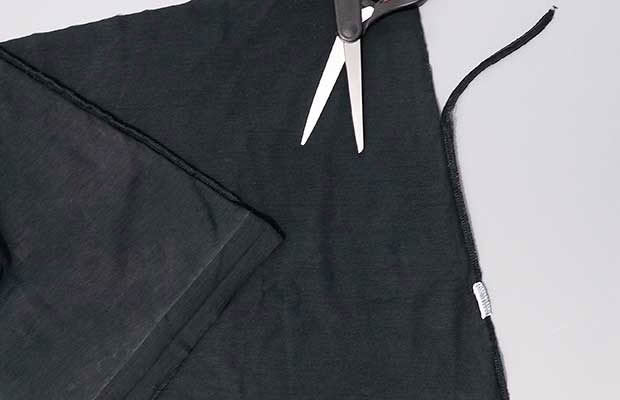
2. Unpick the hems of the harvested bottom sections and give all three hems a good press.
3. Cut away one side seam on each of the harvested bottom sections (see page 134) so they can each be opened up into a long strip of fabric.
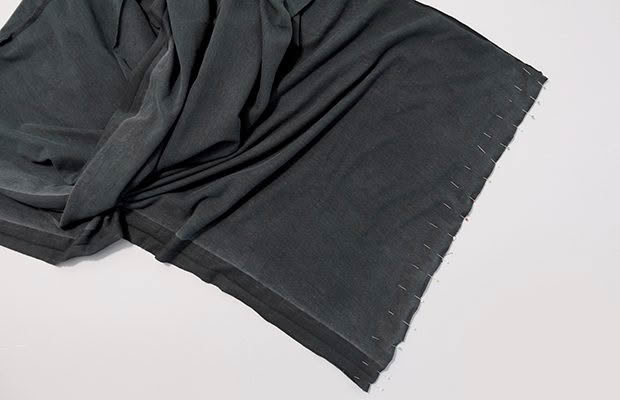
4. With RS facing, sew together the two bottom T-shirt strips to form one large loop of fabric. The circumference will be roughly double the hem circumference of the top T-shirt we’ll attach it to.
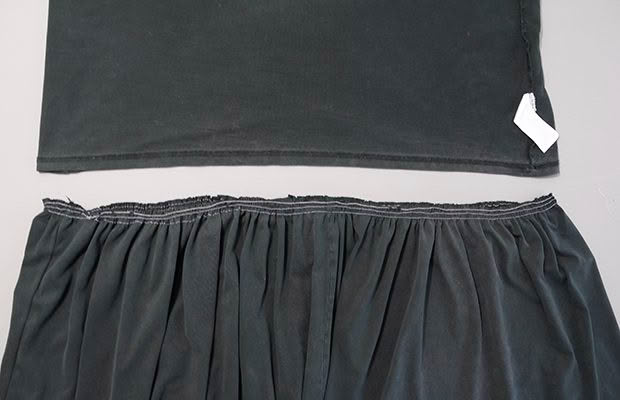
5. Gather the skirt section around the top edge until its circumference is equal to the hem of the T-shirt. To gather, sew three parallel rows of machine tacking/basting stitches (see page 138) along the top edge of the skirt section. Pull on the thread tails to gather the top edge – arranging the gathers evenly – until its circumference is equal to the hem of the T-shirt.
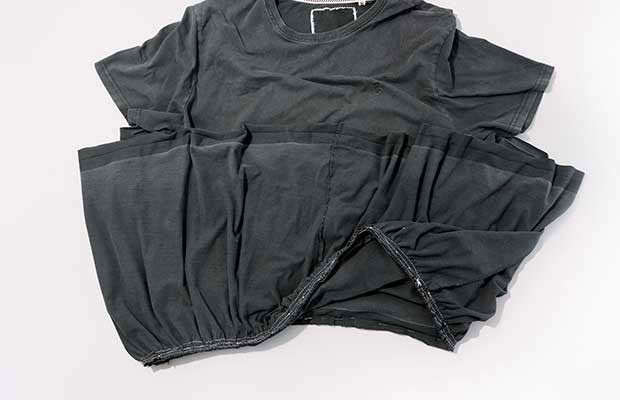
6. With the T-shirt RS out and the skirt section WS out, tack/baste the top edge of the skirt to the hem of the T-shirt, RS together and raw edges aligned. Sew in place, then remove the tacking/basting stitches.
Optional: Sleeveless Dress
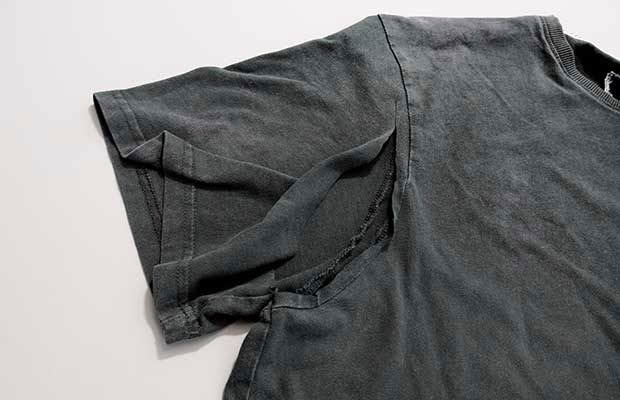
7. Cut away the sleeves approx. 1cm (3/8in) away from the seam. (That 1cm or 3/8in will act as a kind of hem allowance for the armhole at the end.)
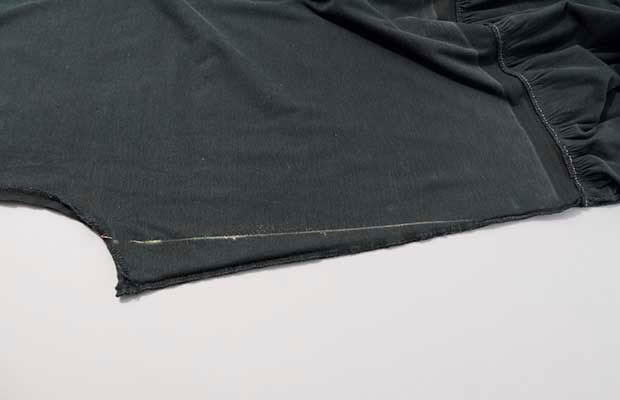
8. Try on the dress, with the WS of the dress facing out. Pinch out the underarm/side seam (see page 128) and observe where you’ll need to take in the side seam, in order for the armhole to sit smoothly. Chalk a line (on both sides) that starts at that point and blends into the existing side seam as pictured.
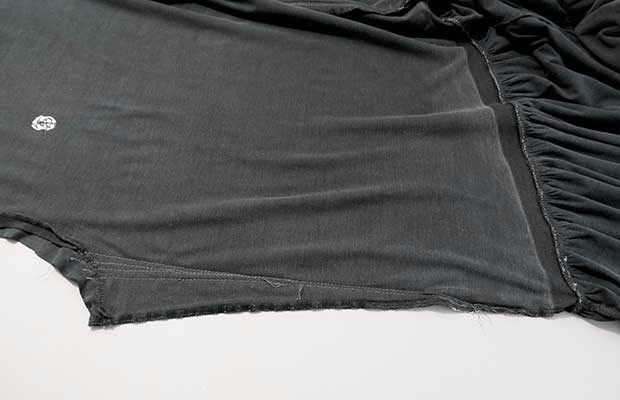
9. With the WS facing out, machine tack/baste the new side seams. Try on the dress again and assess the fit. Adjust if necessary.
Note: I usually start off making the garment slightly looser than needed, then nudge my side seam in a little closer with every fitting until I find my perfect fit – this is why you can see several lines of stitching in the image above.
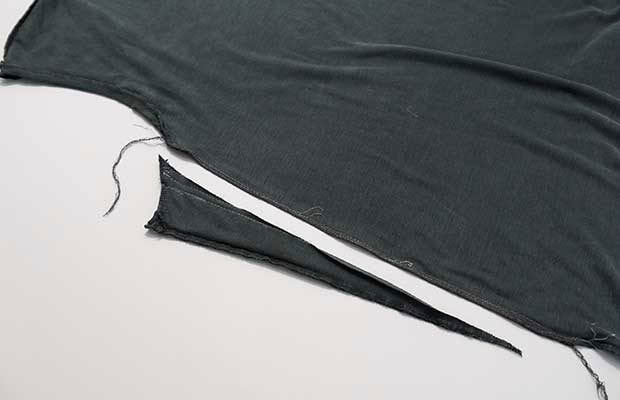
10. Once you have a side seam you’re happy with, serge or cut away the excess and sew the side seam in its new position.
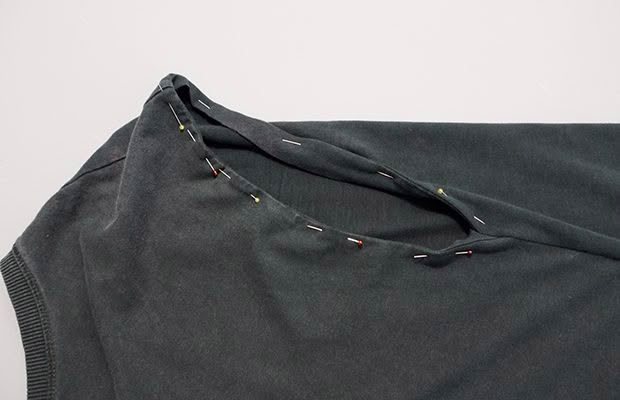
11. Turn the 1cm (3/8in) armhole hem allowance (HA) to the wrong side so it encases the original sleeve seam.
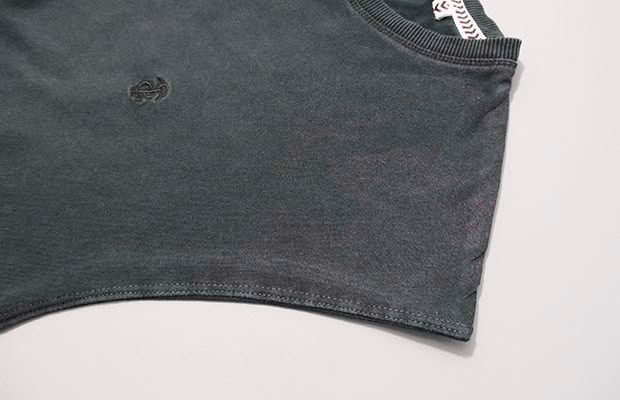
12. Sew the armhole HA in place through both layers, catching the edge of the original sleeve seam. Press and trim away the excess hem allowance, close to the stitching.
Tips & Tricks
Each of the three T-shirts had faded slightly differently. Once the refashion was complete, the dress was given a refresh dye with a black machine dye to create an even colour throughout the garment.
Dyeing means you can combine different T-shirts and unify their colours. Just remember to use cotton thread for any top-stitching as synthetic thread will not take the dye. Accept that there may be a variance in the final result: if, for example, the fabric being dyed was not all the same colour to begin with, dyeing may create different tones of one colour.
Have a play:
· Use the same process and more T-shirts to create a tiered maxi dress.
· Add pockets, using some of the fabric from the leftover upper T-shirt sections.
· Use T-shirts of different colours, tones, and prints for a more colourful piece.
· Position the seam joining the skirt to the T-shirt at the waist or under the bust for different silhouettes.
· Add an ungathered panel instead.
An extract from The Re:Fashion Wardrobe: Sew Your Own Stylish, Sustainable Clothes by Portia Lawrie, RRP$55, Release Date 1st April, Published by Search Press, Distributed by Bateman Books

