Water Cooler: How to make marbled paper using shaving cream
This week in the water cooler: Cheree gets crafty making marbled paper gift tags, Nadene has some handy advice ahead of the hot summer, and Emma says, ‘Yes, cheese’.
MISS MARBLE
When I was young, my sister and I were given this amazing DIY marble paper kit. It’s one of those things kids adore and parents hate. Our attempts to make it were always denied for reasons which I relate to much more as an adult than I did as a kid: messy, time-consuming, potential to start WWIII.
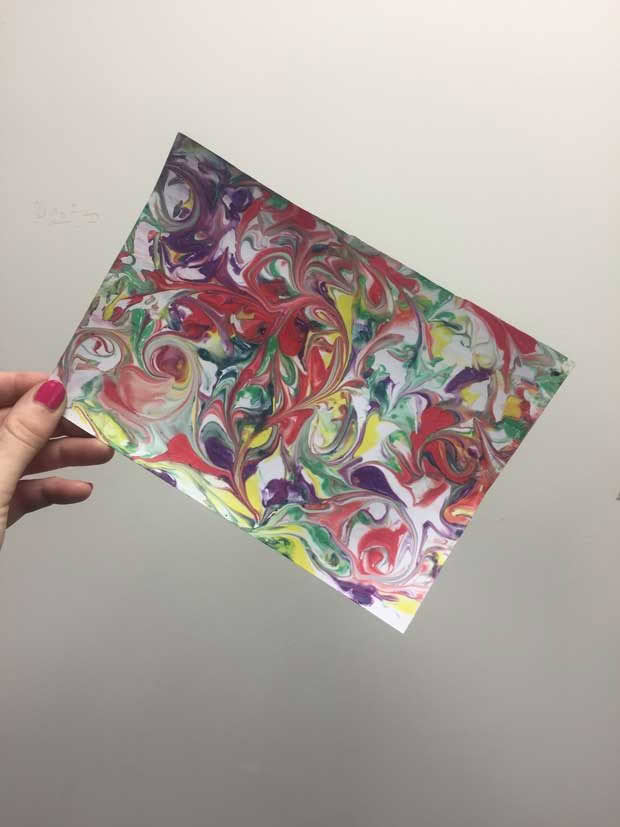
When this easy DIY video for marbling paper popped up on Facebook via Buzzfeed, I knew I had to give it a go and finally fulfil my desire to pointlessly make a mess.

Full disclosure: I am not a crafty person. My sister inherited all of the artistic genes (my stick figures have been mocked in the past) but this works, and it’s easy! You can marble paper using shaving foam and some food colouring or liquid paints. Who would have guessed?
What you need:
A can of shaving foam, not gel – I used Gillette, $6 from The Warehouse
Liquid watercolour paints or diluted food colouring – I bought a Kids Craft Tie-Dye Making Set which helpfully had the paints already in dropper bottles, and a stash of plastic gloves, $9 from The Warehouse).
A plastic container for the foam, big enough to fit your paper
Choice of paper or card – normal copy paper is too thin, so go for a slightly heavier card.
A chopstick or similar to swirl the paint with, and a dropper for the paint (if you go for something other than the tie-dye set)
Something to scrape the foam off with – I used cardboard, but something more solid, like a ruler, may work better.
Another container for the scraped-off foam, and covers for the table in case of spills.

What to do (the simple version)
Fill the container with enough shaving foam to give a good base with no gaps or holes and smooth off the surface – I used my gloved hand to do this.
Drip the paint across the top in a pattern – how much paint to use depends on the effect you want.
Use the chopstick to swirl the paint around to create a marbled effect.
Place the paper on top and press down gently to avoid white gaps.
Lift the paper up, scrape off the foam – that’s it!
You can use the foam several times and top up the colour, or simply add a new layer of foam over the top and start again.
TIP: It might pay to pop something heavy on top of the marbled paper once dry to stop the edges curling.
There is far more detail in the original post, which has been shared almost 50,000 times: https://artfulparent.com/2017/01/diy-marbled-paper.html
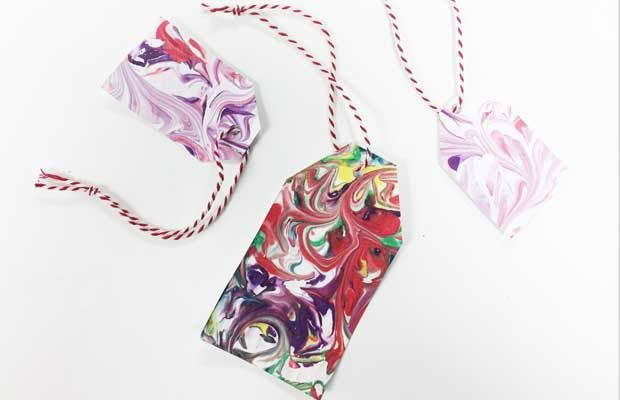
This is simple and fun. It’s perfect for making Christmas cards or Christmas tags with a little homemade heart. Kids (and big kids) will love it as it’s easy, not too messy and affordable.
Have a go – I would love to see your creations!
Cheree Morrison
Insider’s Guide Editor
PS- if you run out of time to make these before Christmas, try these easy printable ones instead.
RAIN, RAIN, PLEASE COME AGAIN

The water tanker truck has just left my block. I’ve gained 10,000 litres of cold, clear water and handed over $280.
If only my water source was this big. This is the Wairoa Reservoir in the Hunua Ranges, one of the big dams that supplies Auckland.
Look past the Canada geese parents and their goslings and you’ll see the stones running down the inside face of the dam change from deep blue to a pale grey. That’s how far the water level is down from its winter peak already.
Each season, climate experts NIWA present forecasts on how things are likely to go and while they’re predicting higher than average rainfall for my region, the weather hasn’t gotten the memo. It is as dry as a bone here, and I’m saving up for the next tank. If you need water or stock feed, now is the time to buy.
Nadene Hall
NZ Lifestyle Block Editor
BREAKING THE MOULD

NZ Life & Leisure editor Kate Coughlan was my hero when she came back to the office with a huge wheel of Lindis Pass brie a few weeks ago. Anyone who can make their own cheese ranks highly in my books.
I find the weird science of microbes, cultures and ageing fascinating. This week, Whitestone Cheese announced it had found Penicillium roqueforti mould in Oamaru.
Blue Roquefort cheese is known as the ‘King of Cheeses’ and is named after the caves in France where it was first discovered. Whitestones’ cheesemakers discovered the mould in New Zealand after “bioprospecting” for it. They first tried taking bacteria swabs in limestone caves but finally discovered it inside a hay bale.
Whitestone Cheese chief executive Simon Berry told TVNZ1’s Breakfast he hopes to take the New Zealand ‘Roquefort’ cheese to the World Cheese Championship in Wisconsin next March. New Zealand’s Champions of Cheese Awards are announced in March – entries are now open.
Emma Rawson
thisNZlife Editor
DAY OF THE DOG

The motorway was blocked. Not a surprise when you live in Auckland. But this blockage turned out to be a more serious leave-the-motorway-at-the-next-stop incident.
That’s how I came to be on a back road. In the middle of that back road, flying along the white line with a bus behind him and a truck coming up fast, was a dog. Ears afloat, legs and paws flying, having the time of his life.
I had two seconds to safely make a move. I stopped the car, opened the door and called “come on baby, get in!” in my best happy dog voice.
And he did, neatly leaping in and making himself comfortable on the passenger’s seat. He licked my hand and looked happy. Then he ate my lunch.
After failing to find his home, I took him to the nearest vet. One sweep of the wand to check for a microchip. Nothing.
The receptionist and I shared a look of disappointment. She reset it and tried again. Beep! We cheered. Zeuss beamed back at me and wagged his tail. Then he sat on my foot.
All pets dogs should be microchipped and that number registered with your local council. But if someone like me finds your dog (or cat), we have the option of taking it to a vet and getting the microchip scanned. If you have also asked to have the chip details put on the NZ Companion Animal Register (NZCAR), the vet can ring you and you can avoid expensive pound fees and a lot of fretting.
You can check and update microchip information on the online NZCAR database. If your animal isn’t on it, talk to your vet or local SPCA and they can help – there is a $15 admin fee to register your animal’s details for the first time, but after that, it’s free to change details like your address when you move. You can also flag your animal as lost or stolen – that’s a good one because a vet will immediately know if someone dishonest has your animal.
Zeuss definitely approved. He got a car ride to Drury, a sandwich, and lots of cuddles. Best of all, 15 minutes after the beep, he was on his way home.
Nadene Hall
NZ Lifestyle Block Editor

