How to grow vine tomatoes with string frames, mesh frames and cages
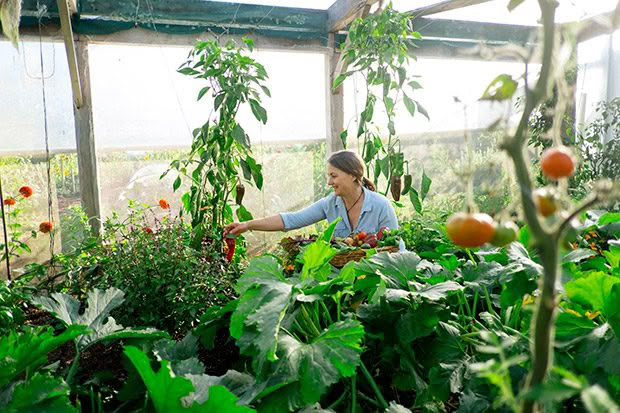
© Kath Irvine 2021
Gardening guru Kath Irvine breaks down different ways to support vine tomatoes in her book, The Edible Backyard.
Words: The Edible Backyard by Kath Irvine Illustrations: Jenny Haslimeier
Tomato seedlings start arriving in shops as early as September, but unless you have a greenhouse, don’t rush in. You’ve got until January, which some years is when summer proper starts around here anyway. Tomatoes aren’t a spring crop, they are very firmly in the summer camp — heat lovers. Planting them into cold soil and cold air is not the way to glory. Patiently await the heat, which means a minimum soil temperature of 18˚C and nights at least 13˚C.
Soil prep: There are more recipes for preparing soil for tomatoes than for any other crop. I’m for keeping it simple: a bed of compost is the perfect recipe. Add a full spectrum mineral fertiliser or well rotten manure if your garden is new or you don’t quite trust your compost. Set up your frames and plant at 40cm spacings.
DETERMINATE AND INDETERMINATE: THE DIFFERENCE
Tomatoes come in two styles — determinate and indeterminate. Nearly all the tomatoes you’ll come across are indeterminate: the vining ones that grow up and up, and up some more if you let them.
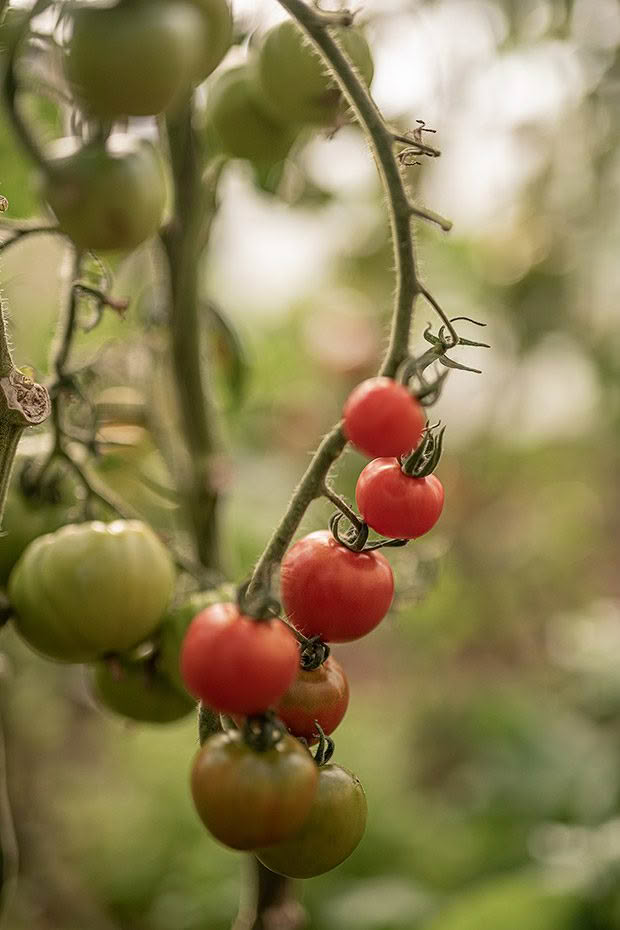
© Amber-Jayne Bain 2021
Indeterminate toms bring the best value, because they continue to flower and fruit over a long period. Determinate ones stop growing at a particular height, burst into flower and all the fruits arrive in pretty much one go. They usually have ‘bush’ or ‘early’ in the name and are suited to pots and gardens with a short growing season. You can grow a succession of these for a steady supply. Semi determinate are somewhere in the middle.
FRAMES AND CAGES
1. Semi Determinate and Determinate Tomatoes
Use a cage or stake that matches the finished height. Bush tomatoes don’t need any support, unless your garden is windy.
2. Indeterminate Tomatoes
Tomatoes need a strong frame. When fully stretched out and covered in fruit they’re very weighty. They also need height, preferably 2m to maximise the potential. Reinforcing mesh ticks both these boxes with the bonus of being quick to put up.
Choose two sturdy 1.8m stakes, bang them well into the ground and tie the mesh off. I’d add another stake every 3m if you are going into tomato production and have a long row. You can use any other sturdy mesh — a wire bed base, deer fencing — keep your eyes peeled at the recyclers.
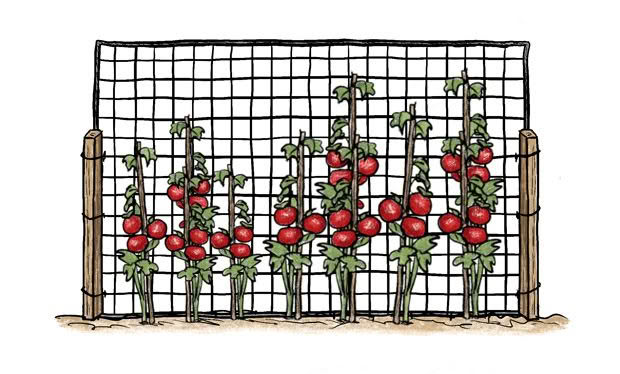
Reinforcing mesh frame: Use robust stakes, 50x50mm, tall enough that they come 3/4 up the frame.
The other option is to send toms crawling up strings, which is what vining plants were born for. You need a tensioned overhead wire or beam for this, or make your own frame. Hang strings off, making them long enough to either be planted under the tomato or attached to a horizontal pole sitting just above ground level.
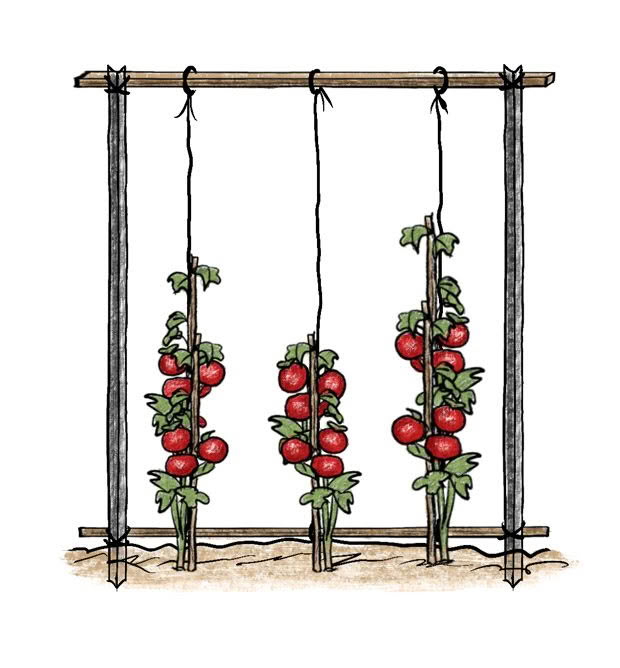
String frame, method one: Bang waratahs into the ground firmly. Lash a pole or stake to each waratah, tall enough to create a 1.8-2m overall height. Lash a pole or stake across the top. Lash a stake across the bottom of the frame. Tie lengths of twine to the top of the frame, at 40cm spacings, and tie the ends to the bottom of the stake. Plant the seedlings underneath so they can wind up the strings.
The type of string you use will dictate whether or not you bury it. Jute is dandy because at the end you can compost it along with the tomato plants, but it’s best not to bury it. Because it isn’t the heartiest of string, twine two together, just to make sure. Baling twine is excellent — strong and can be buried. Though it won’t compost at the end: I reuse it year after year after year.
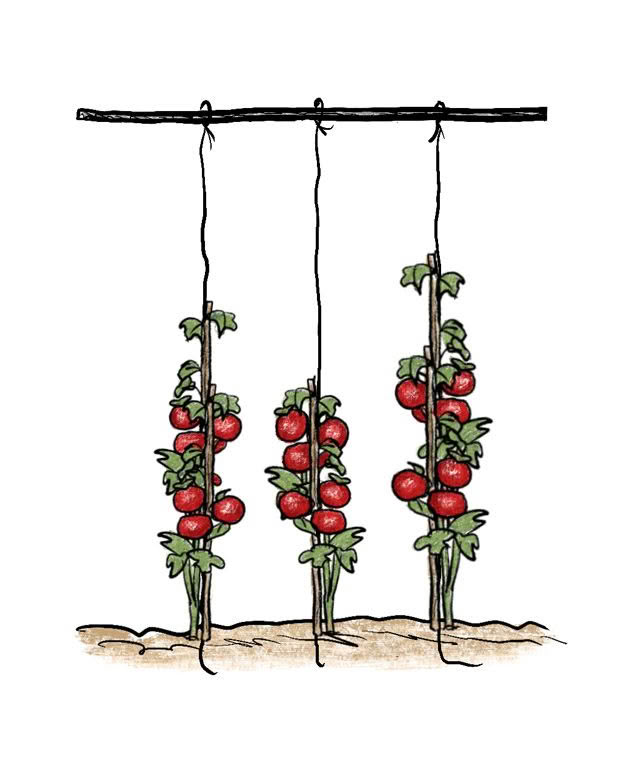
String frame, method two: Use an existing overhead wire or beam 1.8-2m above ground. Bury the ends of the strings beneath the plants at planting time. Plant the seedlings underneath so they can wind up the strings.
Arches are fun. Make a tunnel along a pathway between garden beds — up one side and down the other… as long as you can reach the plant to prune and pick and you can walk beneath it without hitting your head on tomatoes! Bang in a sturdy stake for each corner and stretch reinforcing mesh or deer netting up and over. Attach it with cable ties or thin gauge wire.
Cages for cherry tomatoes: Let cherry tomatoes embrace their wild nature by leaving them to sprawl every which way if you’ve got the room, or sit them inside a tall narrow cage. Make your own cage by tying a piece of mesh in a cylinder.
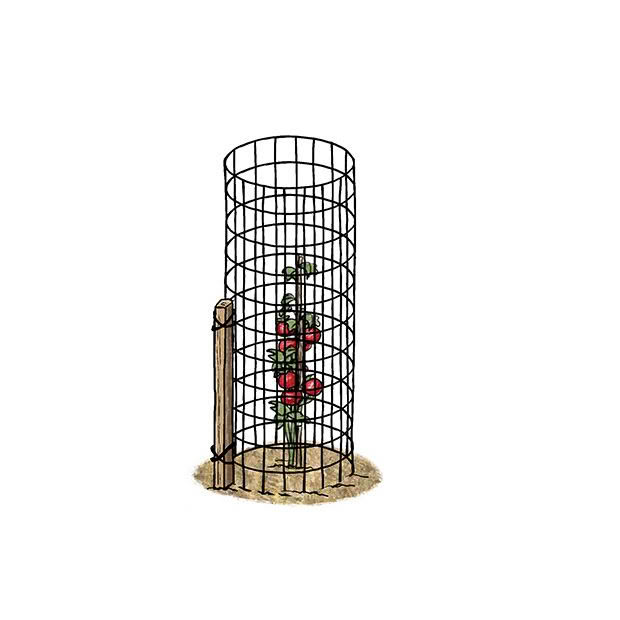
Shape reinforcing mesh into a cylinder. Push it over the top of the newly planted seedling. Attach a robust stake to it.
Wide mesh is best as you’ll need to get your hand through to reach the fruits inside. A narrow circle gives you access to the middle, and tall is good so you can send all that outward energy skyward. Poke new growths in and up, winding them through the mesh.
GROW
I’ve given up growing outdoor tomatoes and stick to the greenhouse. My first are sown at the end of winter and planted in spring. I sow another lot in December and plant them in January. In humid weather open the greenhouse for a cross draught to mitigate fungal disease. Even if the weather’s on the chilly side, a small crack at the bottom of all openings will stir the air and keep it moving. Tomatoes love comfrey and seaweed, lay one or both beneath the mulch. Keep the mulch clear of the stem.
PRUNE
A single leader tomato is a very fine thing — easy to stake, easy to pick and easy to spray. It’s also easier to spot pests, but most important of all in my climate (high rainfall, not reliably hot), a pruned tomato lets in plenty of airflow and sun for best health and ripening.
LATERALS AND LEADERS
Laterals are the growths that appear in the crook where the leaf meets the stem (aptly named the armpit by Kiwi gardening notable Hannah Zwartz). Left to grow they will turn into another plant. You can in fact plant them out and they’ll grow.
If a single leader tom is what you want, laterals all need to come off. It’s best done when they’re small for a minor wound that heals lickety-split. Go through a couple of times a week snapping them off. Start at the bottom and work your way up. If done regularly it’s a quick job with only one or two new shoots needing removal at a time.
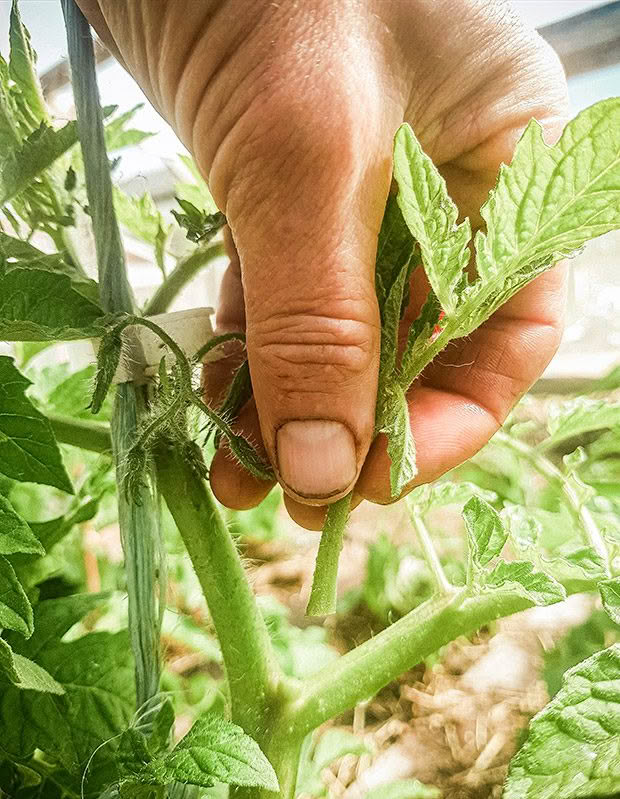
Pluck out tomato laterals to create a single leader and keep plants open for airflow and light. © Kath Irvine 2021
If a lateral gets away on you, you can either prune it off or keep it. Two leaders can go on a stake — one in front, one in back. If you are using a trellis or mesh frame you can let three or four go if you wish. You can, you see, create whatever shape you want.
If your tomato has had a rough start because of a cold season, you can replenish it by letting a lateral near the bottom of the plant shoot away. Wind it around the established stem as it grows and in a month’s time your poorly looking tomato will be disguised under a fresh green vine.
Extracted from The Edible Backyard by Kath Irvine, published by Penguin Random House NZ, RRP $50.00. Text © Kath Irvine 2021.

