Homemade wedding decorations: Make your own bunting, hydrangea confetti and cake toppers

When self-sufficiency enthusiast Julie Legg tied the knot on her Waikato lifestyle block, she created her own finishing touches for a wedding with flower confetti, bunting and other themed decorations.
Words and photos: Julie Legg
Weddings need not be grandiose, expensive affairs – in fact DIY celebrations are becoming more popular since they lend the personal touch adding fun and flair to your day. If you can invest the time, setting your creativity in motion can also be extremely satisfying.
There are just two golden ‘rules’: decide on a theme to keep your ideas cohesive and… know your limits. It’s not every bride-to-be who can whip up their dream dress on a sewing machine. Depending on your level of skill and enthusiasm, your hands-on contribution can include invitations, wedding arches, homemade furniture, table decorations, indoor and outdoor flowers, wedding favours and catering.
BIG-DAY BUNTING
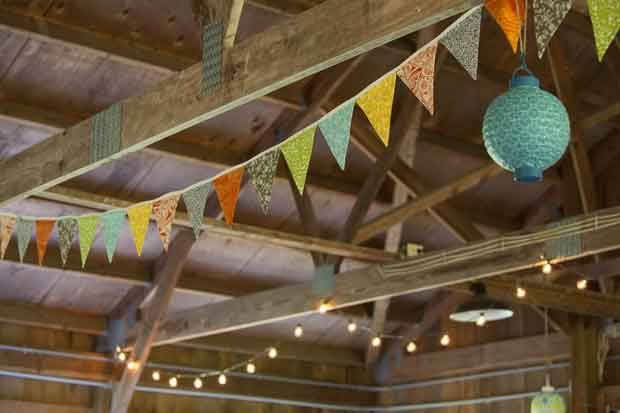
Double-sided fabric bunting looks so festive when draped around trees, hung from the roof or pinned to a catering table. Use it indoors and out.
HOW TO MAKE BUNTING
What you’ll need:
• Brown paper
• Cotton fabric
• Shearing scissors
• Ribbon or bias binding
• Sewing machine, cottons and pins
1. Cut a template from brown paper to desired shape. An isosceles triangle (with two equal sides) is the most common.
2. Select the fabric. Cotton is easy to work with as it doesn’t stretch on the bias. Eclectic cottons can be found in the remnant bin of your local fabric store. Fold the fabric in half, pin on the template and cut using shearing scissors (which helps to minimize fraying). Once you have gained confidence, cut multiple triangles together for better efficiency.
3. Take two matching pieces of fabric, ‘good sides’ facing out, then sew together around the edges. A zigzag stitch will help to minimize fraying. Repeat with remaining fabric cut-outs.
4. Pin the short length of each triangle at equal intervals along the ribbon (eg: 1-2cm apart), then stitch to secure. Sew together as many strips of ribbon as required, adding more bunting as you go.
FLOWER-POWER TIPS
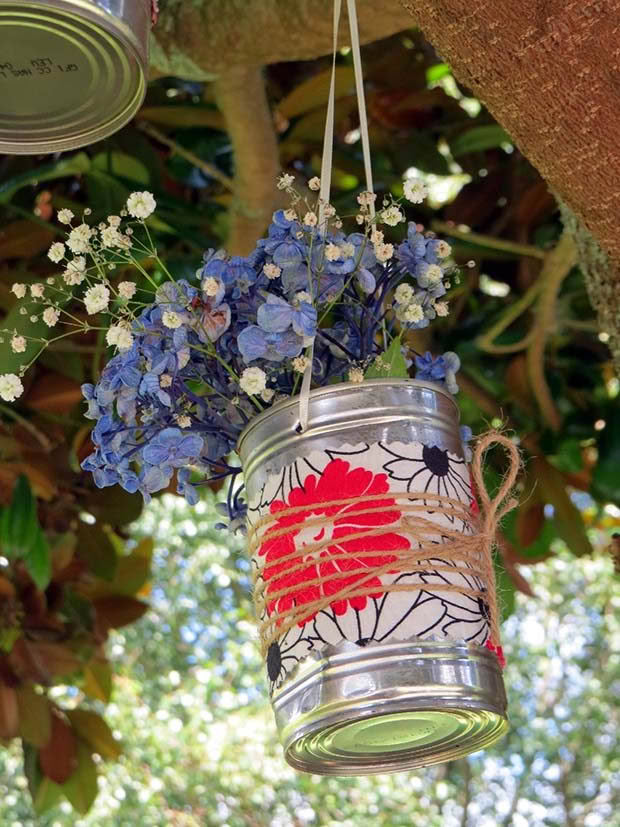
Using seasonal flowers en masse is cost effective and visually striking. From bouquets and pin-hole flowers to indoor and outdoor arrangements, to strewn petals to adorn the aisles, the possibilities are endless.
• Get creative with containers: watering cans, old Agee jars, teapots, fish bowls, water jugs or upcycled tin cans all make great flower vessels. If none can be found around the home, a trip to a charity shop will yield an array of options at reasonable prices.
• Adorn trees with flower stems: to stop them wilting, get some ‘water savers’ from the florist. Each plastic capsule holds enough water to hydrate the stem for at least 24 hours.
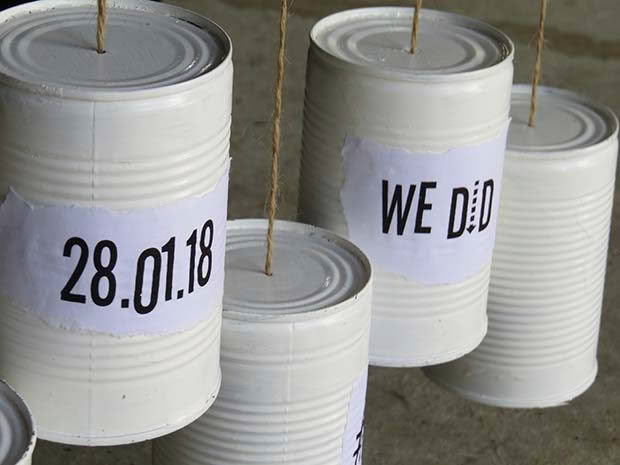
• Upcycle tin cans: remove the top cleanly so there are no sharp edges. Soak in soapy water to remove outer label then use mineral turpentine to remove any adhesive residue. Once dry, paint or adorn with fabric (PVA craft glue is perfect for this). Finally, puncture two holes on either side of the can, just below the top rim (a large nail works well but place a piece of wood inside the tin before puncturing it so the tin keeps its shape). Make the hole just big enough to thread a ribbon or string for hanging.
• Jolly-up glass jars: part-fill jars with marbles, shells or colourful stones. This helps stabilize the jar and adds another visual element to tie in with your table setting.
HOMEMADE CONFETTI
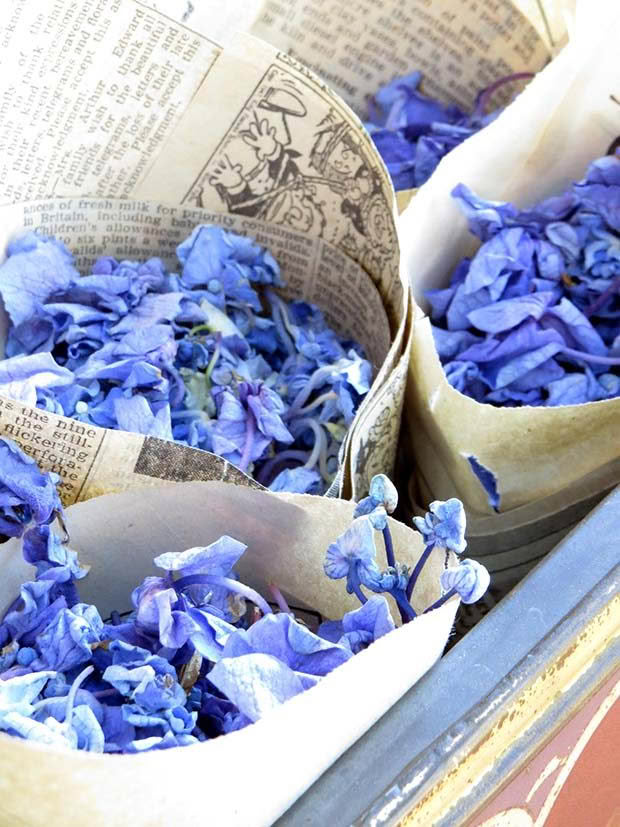
Petal throwing is a much-anticipated tradition once the formal part of the ceremony is over. While fresh petals are pretty, they are prone to browning which is why dried flowers are a popular choice for throwing and as a table decoration.
Biodegradable flower confetti is commonly made from dried lavender, dried rose petals, hydrangea petals and vibrant cornflower petals. Tiny rose buds or pansies can also be dried whole.
To make your own, use a dehydrator on a low setting, a very low-temperature oven, or place in a single layer in an airing cupboard. Ensure the petals are completely dry and crispy before storing in an airtight container, out of direct sunlight.
• Collect in-theme coloured petals from the garden throughout the season and dry them in batches. The volume will reduce substantially once petals are dried; it pays to do this some months ahead of the event so you have time to prepare more if needed.
• Select vibrant petals; white is prone to yellowing.
• Petal colours may remain vibrant but the scent may fade. Spray dried petals lightly with your favourite perfume or a drop of essential oils to help keep them smelling glorious.
• Present petals in a large bowl or provide guests individual pouches of petals to toss. Pull-tie organza bags or paper cones made of newspaper or colourful paper are great options.
CAKE TOPPERS WITH CHARACTER
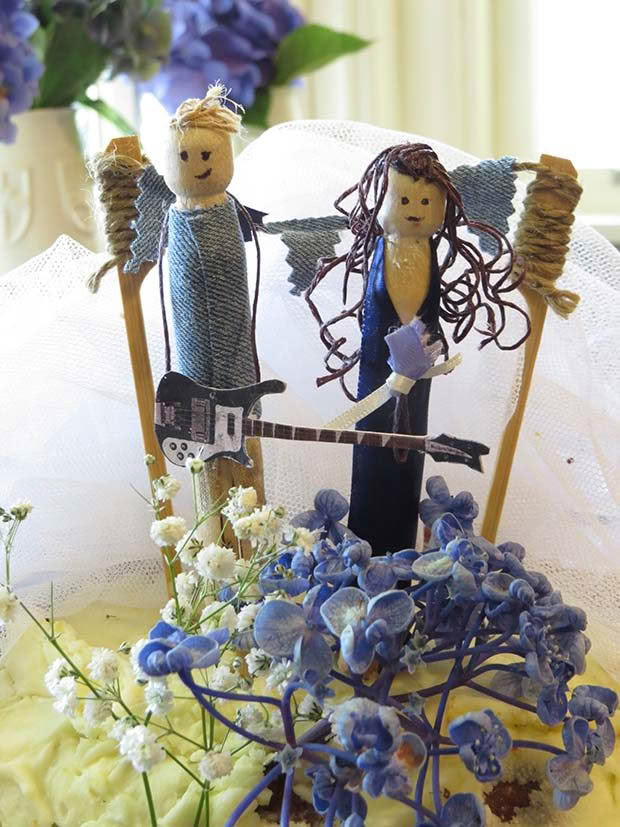
If a store-bought bride-and-groom plastic cake topper doesn’t fill the wedding pair with glee, a handmade, personalized alternative might bring a smile to their faces – and those of the guests
What you’ll need:
• 2 large wooden pegs
• 2 ice-block sticks
• PVA craft glue
• Sewing scissors
• Offcuts of string, wool, textured fabrics, buttons, lace ribbon etc
1. Secure an ice-block stick between each set of wooden legs of the caricature bride and groom so that the stick is submerged in the icing rather than the feet of the happy couple.
2. The body: Take inspiration from each personality, whether it be chosen clothing for the big day or hobbies. Carefully cut lengths of ribbon, lace, fabric etc and glue ‘clothes’ onto the wooden pegs. When working around the ‘legs’, a pair of tweezers or a knife can help feed fabric through the gaps and hold it there while the glue dries.
3. The head: Threads of string, tufts of wool, or even waxed string (which holds its shape well) can be applied and patiently glued on. A veil or flowers can be affixed to the hair.
4. The face: If drawing isn’t a natural talent, don’t force it. Make the faces minimal. A light stroke of a ball-point pen can hint at the eyes and mouth rather than compete with your work of art.
Julie Legg is a Waikato based Lifestyle & Food Blogger. Foodie. Gardener. Gatherer. DIY Lover – visit her blog rediscover.co.nz

