Craft project: 11 low-waste Christmas decorations to make at home
Transform bits and bobs around the home into festive, sustainable decorations this Christmas.
Words and photos: Mischa De La Cruz & Geraldine Tew and thisNZlife staff writers
Promotors of creativity, mindful making and sustainability, Auckland-based upcycle collective The ReCreators says decking the halls needn’t cost a bomb or the Earth. Check out these crafty Christmas decorations – they’re fun for the whole family.
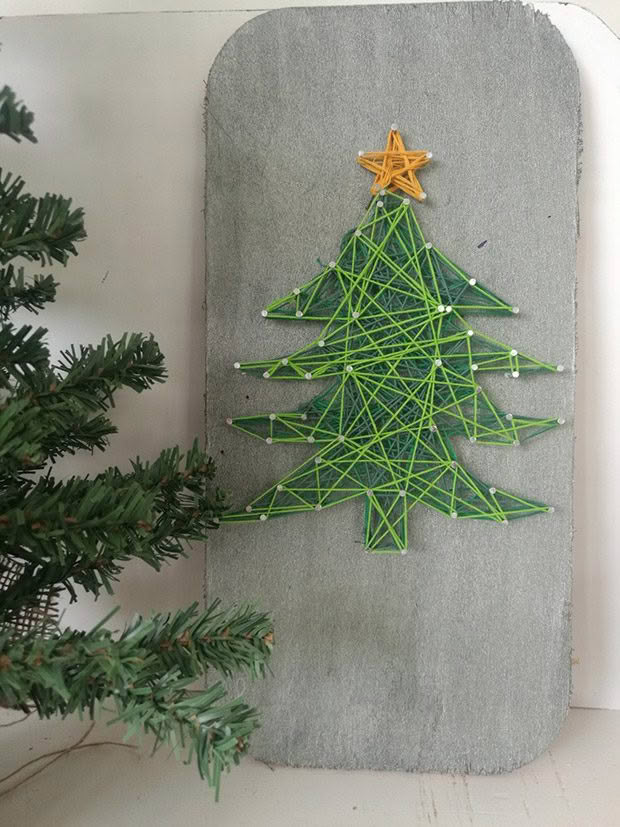
String Art
MATERIALS
a wooden pallet or timber offcut
sandpaper, stain or paint
template
scissors
washi or painter’s tape
hammer
small nails
yarn or embroidery floss
glue
METHOD
STEP 1: Prepare your piece of timber by sanding, staining or painting it.
STEP 2: Design or print out a paper template of a simple image or word, making sure it’s big enough to be easy to read but will fit onto your piece of wood. Cut out then secure the paper template in position with tape.
STEP 3: Following the template outline (starting on the inside of the image and working your way out), hammer nails around the outline of the image or word. Keep them evenly spaced about 1cm apart, while sticking to the design. Remove the template.
STEP 4: Tie the yarn or embroidery floss onto one of the nails with a double knot, then begin wrapping it around each nail, criss-crossing back and forth till you’ve filled in your design. When you’re happy with the look, tie the end of the yarn to a nail with a double knot, then cut it off. Use glue to stick down the loose ends.
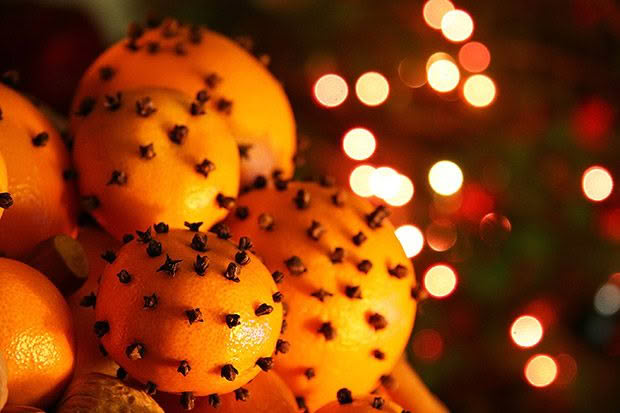
Pomander Ball
MATERIALS
firm oranges
cloves
ribbon or wire (for hanging)
METHOD
STEP 1: Push the cloves into the orange with the sharp end into the orange flesh. Cloves can be arranged in any shape or pattern, for example, circles, a heart, or a Christmas tree.
STEP 2: To hang, wrap a ribbon around the orange and secure a tight knot at the top. Form a loop with the two ribbon ends and tie at the desired hanging location.
STEP 3 (optional): Go a step further by making a pomander candle. Using a sharp paring knife with a short blade, cut a thin piece of orange peel from one end to make a stable base. Cut a hole at the opposite end that is big enough to hold a tealight. Put tea light into the hole and light it once the orange is on a fireproof surface.

TIP:
For a very fragrant pomander (that will last years), cover the entire orange with cloves.
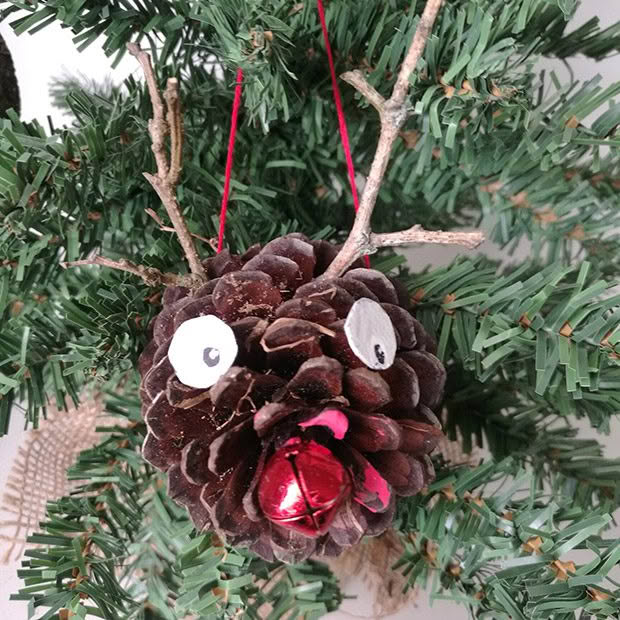
Pinecone Reindeer
MATERIALS
cardboard or paper
scissors
black marker pen
pinecones
twigs
glue
red bells or pompom
string (optional)
METHOD
STEP 1: Cut two eyes out of cardboard or paper and draw on pupils.
STEP 2: Repeat step 1 to create two ears.
STEP 3: Glue the twigs onto the pinecone where you’d like the antlers to go, then glue on the eyes, ears and bell or pompom nose.
STEP 4: If you wish to hang your reindeer from your tree, glue string to its head, leave to dry, then tie in a knot for hanging.
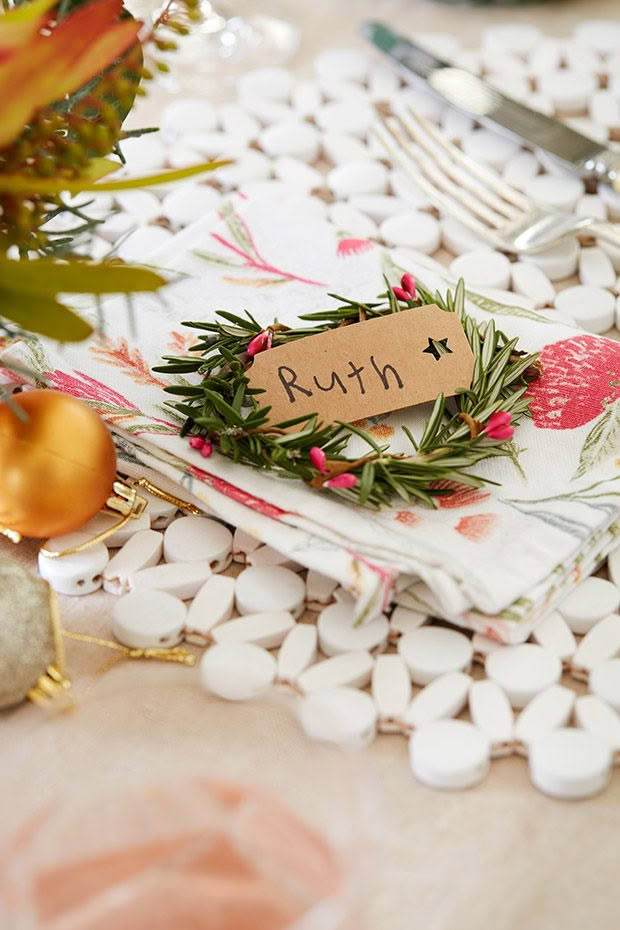
Rosemary Wreath Place Cards

MATERIALS
rosemary
scissors
twine
floral wire
name tags
flowers (optional)
METHOD
Step 1: Soak rosemary in water for 5 minutes or so to make it bend more easily.
Step 2: Cut rosemary into sprigs that are 17-20cm in length. Bend the sprig into a circle (carefully so it doesn’t snap) and secure the two ends together by wrapping floral wire around it.
Step 3: Cover the floral tape with a bow made of the twine.
Step 4: Cut a name tags to fit inside the wreath circumference. Tuck the tag into the center, with the rosemary leaves holding the tag in place. Repeat Steps 2-4 for remaining rosemary sprigs.
Advent Calendar
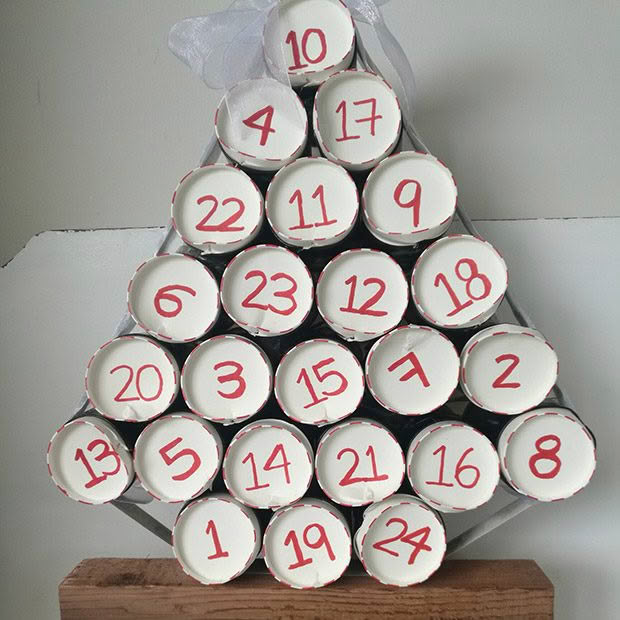
MATERIALS
24 toilet rolls
paint
paper
elastic bands or string
glue
red marker pen
stocking filler gifts or lollies
ribbon (and other decorations, optional)
METHOD
STEP 1: Paint the toilet rolls the colour of your choice. While you wait for the paint to dry, trace circles slightly larger than the opening of each toilet roll onto plain white paper. When the paint is dry, cover each opening with a paper circle and secure with an elastic band or string.
STEP 2: To create a tree-like shape, begin at the bottom, sticking 3 toilet rolls together with glue. For the next layer, stick 6 toilet rolls together, then stick them to the first layer. Continue with the remaining layers (the third layer is 5 cylinders, then 4, 3, 2 and 1 at the top).
STEP 3: When all of your toilet rolls are secure, add numbers 1 to 24 with a red marker, in order, or mixed up.
STEP 4: Fill each toilet roll with stocking fillers or lollies. Decorate with ribbon and other decorations of your choice.
Edible gingerbread decorations

INGREDIENTS
150g butter, softened
¼ packed cup soft brown sugar
3 tbsp golden syrup
1 tsp baking soda
1½ tsp boiling water
2 cups flour
3 tsp ground ginger
1 tsp cinnamon
1 tsp allspice
Royal Icing:
1 egg white
2 cups icing sugar, sifted
Preheat oven to 150˚C.
METHOD
Beat together butter, sugar and golden syrup until pale and creamy. Mix baking soda with boiling water and add to butter mixture with flour, ginger, cinnamon and allspice. Stir to combine into a pliable dough. If not using at once, cover and chill for up to a week or freeze until needed.
Divide dough into 3 pieces and roll out each piece to 5mm thickness, using a little flour to dust the roller if necessary (avoid using too much flour as this dries out the mixture). Cut dough into shapes using cookie cutters of your choice. Carefully transfer to prepared baking trays, allowing a little space between biscuits for spreading.
Form unused dough into a ball and roll and cut again.
Bake until just starting to colour (about 15 minutes). Remove from oven and allow to cool on the trays; they will harden as they cool. Store in an airtight container until ready to ice. Ice biscuits with Royal Icing up to 5 days before serving (they will soften just a little once they have been iced).
To make Royal Icing, gently beat the egg white until slightly airy. Add sifted icing sugar and beat for 10 minutes. Spoon into a piping bag and pipe decorations onto cookies.
Allow to try completely before using as decorations.
TIP:
To hang the decorations, use a toothpick to poke a hole in the dough before it’s cooked. Loop ribbon or string through the hole to hang around the house.
Book Snowman
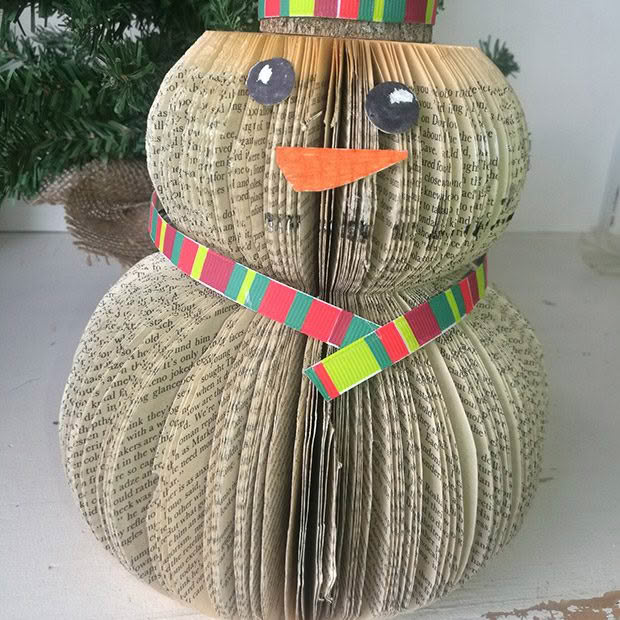
MATERIALS
round lids, glasses or bowls
an old, fat softcover book
scissors
glue
ribbon or old socks
cardboard
buttons
paint or pen
METHOD
STEP 1: Using lids, glasses or bowls as templates, draw a small circle (the snowman’s head) onto the front cover of your book and a large circle (the snowman’s body) onto the back cover.
STEP 2: Carefully cut out the shape of the snowman a few pages at a time. Be careful not to do too many at once, as you may end up with a lopsided snowman. We worked from the front of the book to about halfway, then worked from the back towards the middle, so it stayed even.
STEP 3: Stick the front and back covers together, then gently fan out the pages to form your snowman.
STEP 4: Use a ribbon or cut strips out of socks to make a hat and scarf. Cut out a cardboard nose and eyes (or use buttons as eyes), and paint or colour in. When dry, stick the eyes and nose onto your snowman. You could also add buttons down the front of his body.
Wood Slice Ornaments
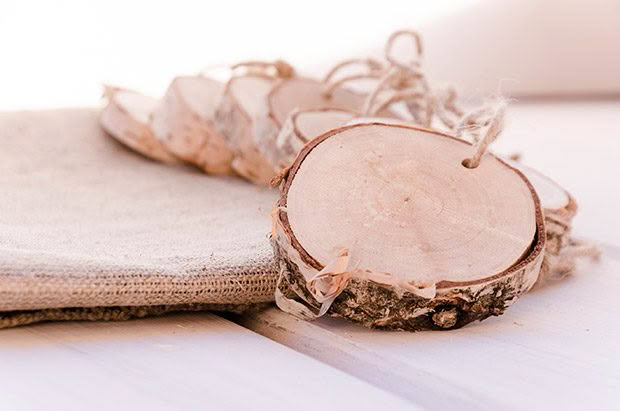
MATERIALS
tree branches
saw
paint
permanent marker
drill
ribbon or string
METHOD
STEP 1: Use the saw to cut 1cm-thick wood slices from pruned branches. Make sure the wood is completely dry (a few weeks in the sun does the trick) before painting a backdrop on each.
STEP 2: When the paint is dry, add words or images. We used Pinterest to get some great ideas, or you could use templates or stamps.
STEP 3: Drill a small hole at the top of each wood slice, thread your ribbon or string through it and tie it in a knot for hanging.
Pinecone Christmas Trees
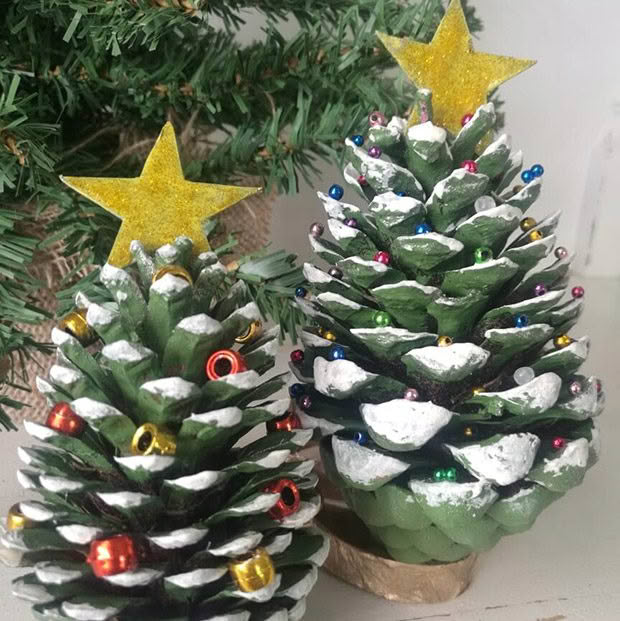
MATERIALS
pinecones
green, white and yellow (or gold) paint
glue
old beads from a broken necklace
cardboard from an old cereal box
scissors
lids, corks or small plant pots to use as stands
METHOD
STEP 1: Paint your pinecones green and allow to dry, then paint the tips white.
STEP 2: When dry, attach the beads with small dollops of glue.
STEP 3: Cut stars out of the cardboard and paint them yellow or gold. Allow to dry, then glue one onto the top of each pinecone.
STEP 4: Glue your finished trees to their stands.
Jigsaw Snowflakes
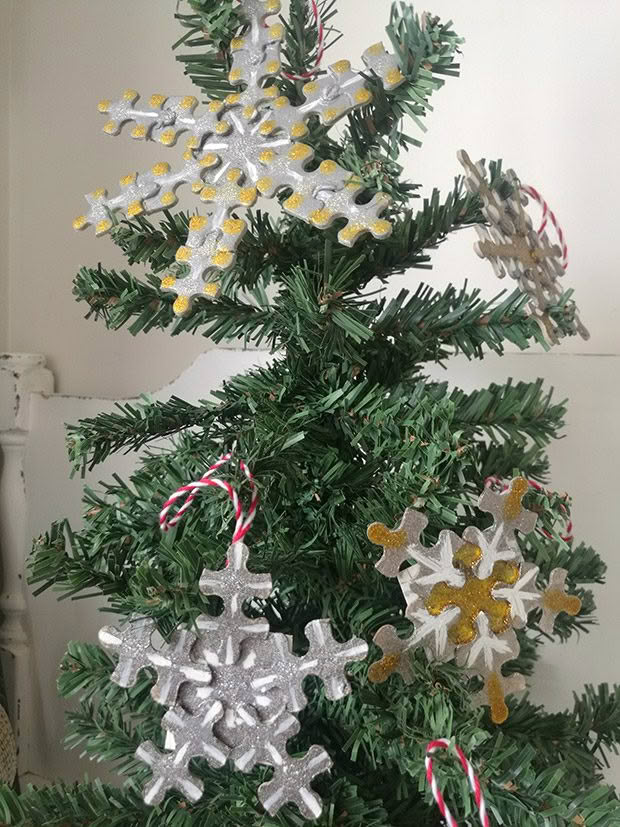
MATERIALS
paper
scissors
old jigsaw puzzle (sourced from an op shop)
glue
paint or glitter
string or ribbon
METHOD
STEP 1: Cut a circle out of paper about the size of a $2 coin. Stick 5 or 6 puzzle pieces onto the circle to create the arms of your snowflake.
STEP 2: Stick more puzzle piece onto each arm to add to the design. Make it as big or small as you like.
STEP 3: Paint both sides of the snowflake with a base colour, then use a different colour of paint (or glue and glitter) to add accents, for example lines and dots.
STEP 4: Tie on some string or ribbon from which to hang the snowflake from your Christmas tree.
Find out more about the Re-Creators, their community workshops and after-school and holiday programmes here.

